How to Clean Fishing Reels Like a Pro
Learning how to clean and maintain your fishing reels isn't just a chore—it's one of the most important skills you can develop as an angler. Done right, it protects your investment and guarantees your gear will perform when you need it most. The process is straightforward: a gentle rinse, a careful disassembly, a deep clean with the right stuff, precise lubrication, and putting it all back together. This routine maintenance is your first line of defense against the elements.
Lessons from Legends on Why Reel Cleaning Matters
Before we dive into the nuts and bolts, let's talk about why this matters so much. For sportfishing icons like Ed and Frank Murray, who battled monster marlin in high-stakes saltwater tournaments, gear failure simply wasn't an option. Their hard-won experience taught them a simple truth: a well-maintained reel is often the only thing standing between a trophy photo and a heartbreaking story of the one that got away.
Saltwater is relentlessly brutal. It attacks every single component with corrosive salt and abrasive sand. The Murray Brothers treated proactive cleaning not as a task, but as an essential ritual. It was their secret weapon for preventing costly breakdowns and guaranteeing flawless performance when thousands of dollars were on the line.
The Modern Angler’s Duty
That commitment to gear care is more relevant today than ever. Even with all the advanced materials and technology in modern reels, simple neglect is still the fastest way to ruin a great piece of equipment. This is about more than just keeping things tidy; it’s about respecting the sport and ensuring your tools are ready for that fish of a lifetime.
The benefits are undeniable.
- Performance: A clean reel casts smoother, retrieves line evenly, and has a drag system you can count on.
- Longevity: You're actively protecting internal parts from rust and wear, which can dramatically extend your gear's lifespan.
- Reliability: It prevents catastrophic failures during the most critical moments of a fight.
Regular cleaning can extend a reel’s lifespan from just 3–5 years to a decade or more, depending on how and where you use it. For legends like the Murrays chasing tournament wins, that kind of reliability was priceless.
In a market where North America held over 40% of the global share in 2021, the financial incentive for proper care is obvious. You want to get the most value out of your equipment. You can read more about the fishing reel market trends at futuremarketinsights.com to see just how big this industry is.
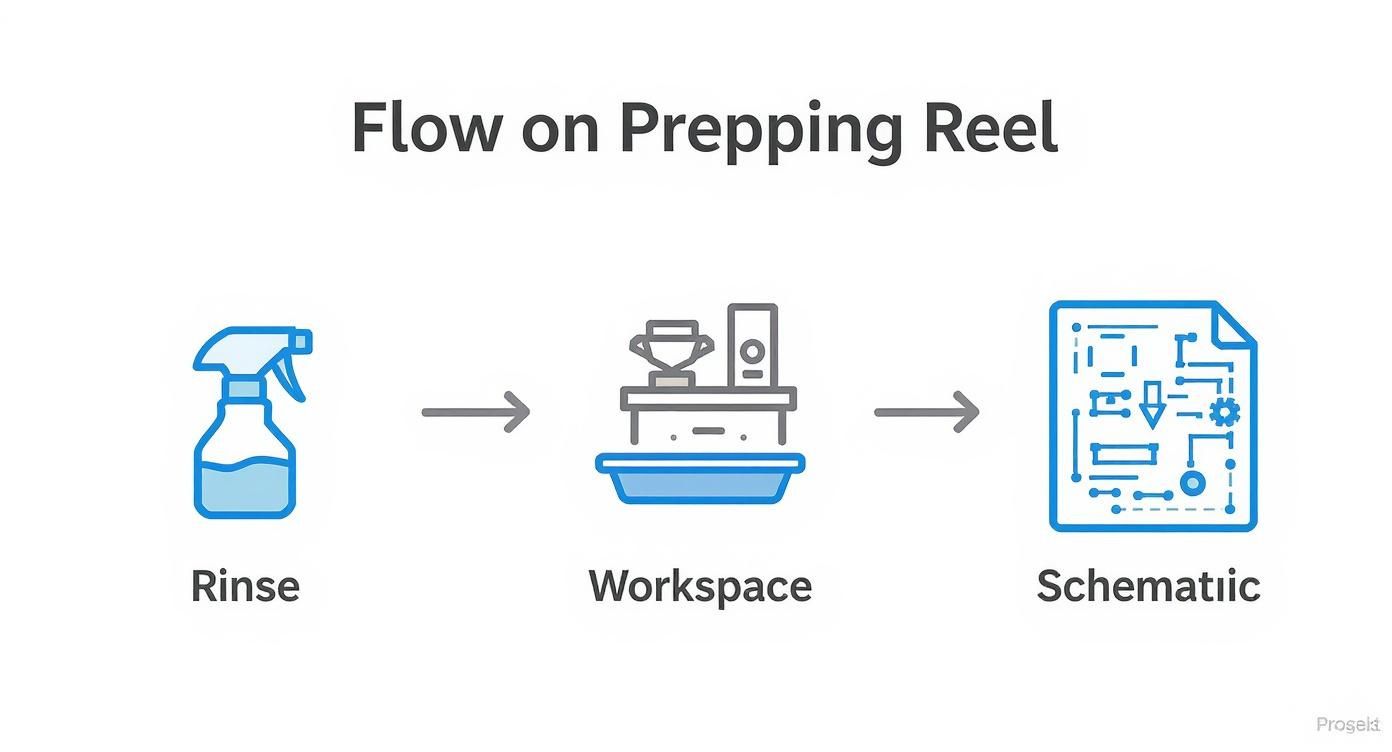
Before You Ever Pick Up a Screwdriver
Any old salt will tell you that a proper reel cleaning doesn't start with taking it apart. It starts the moment you get off the water. If you want to avoid a frustrating, messy teardown later, you need to build the right habits now. This pre-cleaning ritual is what turns a chore into a smooth, routine process.
The single most important habit? A gentle freshwater rinse after every trip, especially if you've been in the salt. I can't stress this enough. Use a light spray to get the salt and sand off the outside, but be careful. Don't blast high-pressure water into the seams or around the handle—you'll just force that gunk deeper inside where it can do real damage. Once it's rinsed, give it a good wipe-down with a dry cloth and let it air dry completely.
Get Your Workspace Ready
With your reel dry, it's time to set up your maintenance station. Trust me, spending a few minutes here will save you a massive headache trying to find a tiny spring that shot across the garage floor.
Here’s what you'll need to have on hand:
- A clean, well-lit table is a must. You need to see what you're doing.
- A magnetic parts tray is a lifesaver. If you don't have one, a baking sheet lined with a white paper towel works great for keeping screws and small parts from disappearing.
- Your reel's schematic. Just look up your model number online and have the diagram pulled up on your phone or tablet. It’s your roadmap for putting everything back together correctly.
Taking a moment to organize your space is a classic pro move. It's about being disciplined. When you start pulling that reel apart, you'll know exactly where every little piece goes, which makes reassembly a breeze instead of a puzzle.
Disassembling Your Reel with Confidence
This is the part where most anglers get a little nervous, but trust me, with a methodical approach, it's easier than you think. When you’re miles offshore chasing a trophy fish, the last thing you want is gear failure. Confidence in your equipment starts right here, on your workbench. Taking your reel apart doesn't have to be intimidating if you just have a solid process.
Your exact approach will change a bit depending on the reel. Whether you’re working on a spinning reel or a conventional one, the core principles are the same: work in stages, keep your parts organized, and pay close attention to how everything fits together. The main components you’ll be taking off are usually the handle, the spool, and the side plates. If you're not sure about the mechanics of your specific model, getting a handle on the key differences between baitcasting vs. spinning reels is a great place to start.
Think of this initial teardown as a diagnostic check. It's your first chance to get eyes on the internal components before you even pick up a cleaning brush.
- Drag Washers: Check them for salt compression. Salt crystals get trapped and harden over time, which is what causes a jerky, unreliable drag.
- Bearings: Give each one a spin. If you feel any grit, roughness, or hesitation, that's a dead giveaway that sand or salt has found its way in. This will absolutely kill your reel’s smooth performance.
- Gears: Look for old, gunky grease. That dark, grime-filled lubricant has to go before you can apply a fresh coat.
The Murray Brothers’ Secret Weapon
Here's a pro tip that takes all the stress out of putting your reel back together: use your phone to take pictures at every single step. This simple trick creates a perfect visual roadmap, completely eliminating the guesswork later on.
As you take parts off, lay every screw, washer, and gear out on your mat in the exact order you removed them. Combining this organized layout with your photos makes reassembly a breeze.
Before you even turn the first screw, get prepped. A quick rinse of the exterior, an organized workspace, and having your reel's schematic handy will set you up for success.
As you can see, the real work begins with preparation. A methodical approach is the key to a smooth, successful maintenance session.
The Deep Clean for Grime and Old Grease
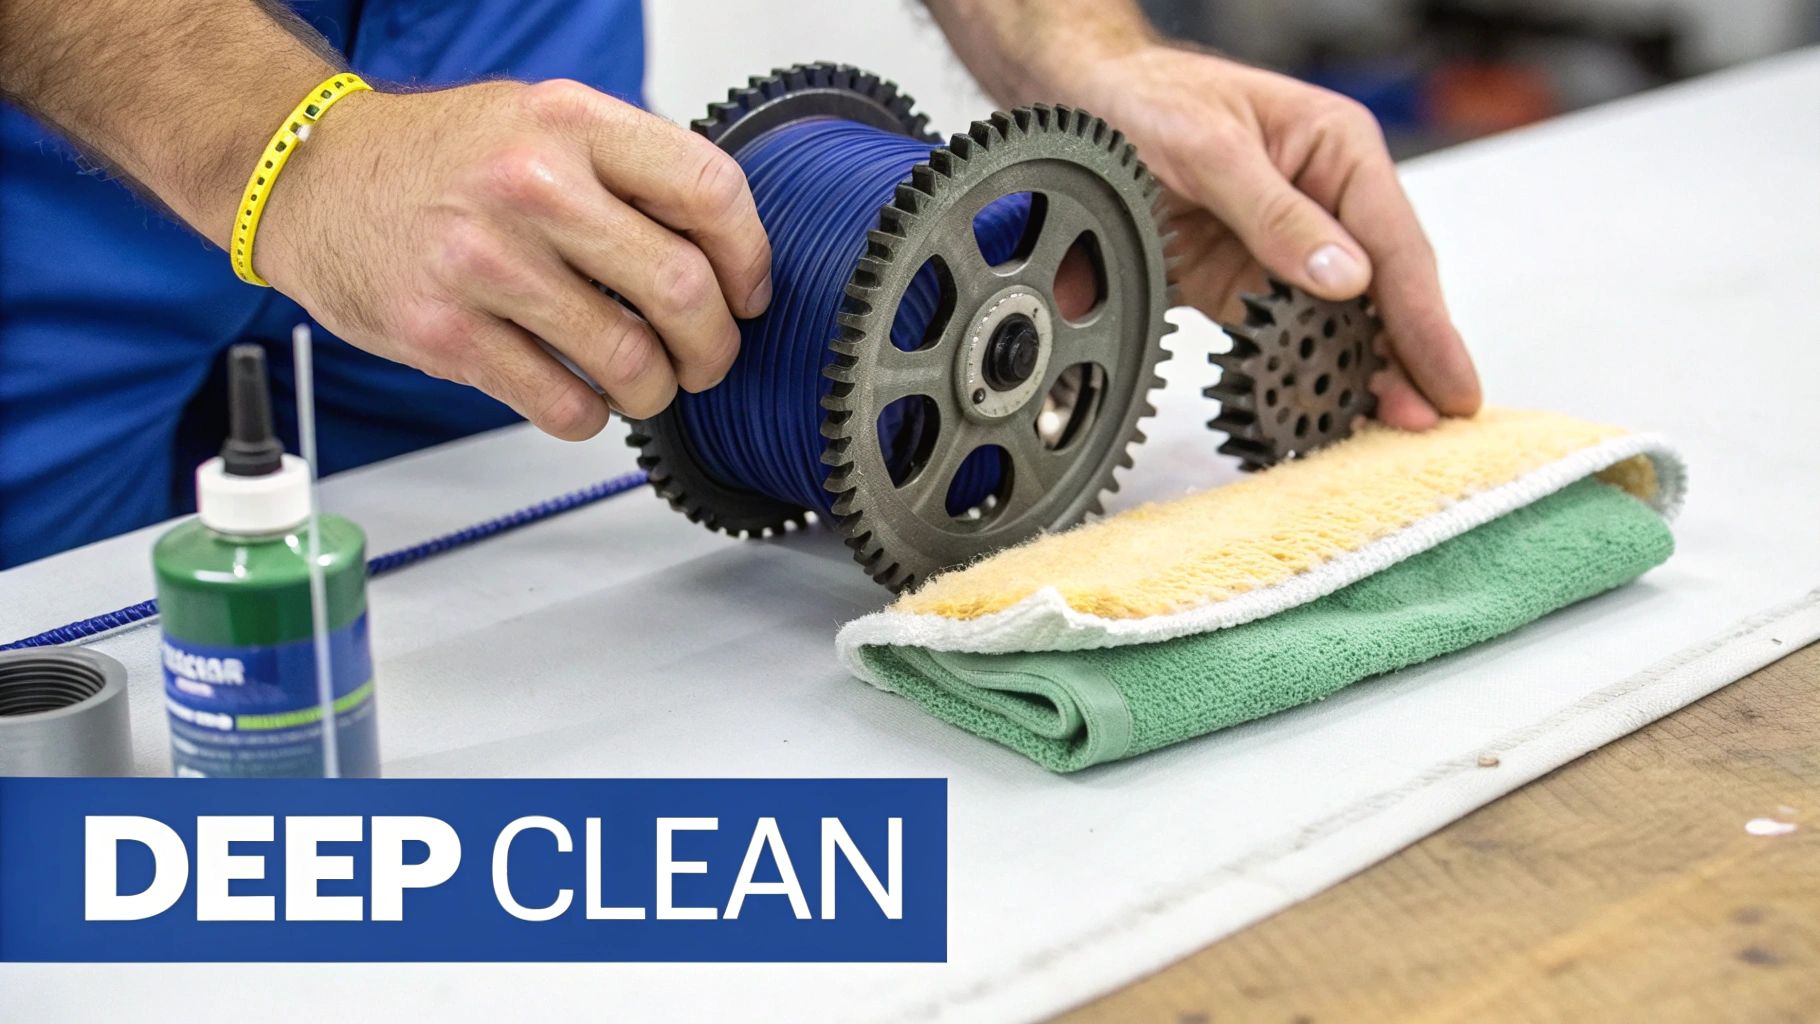
Alright, with all your reel's parts laid out like a puzzle, it's time to get down to business. This is where the magic happens, separating a good reel from a great one. Legendary anglers like Ed and Frank Murray built their reputations on this kind of meticulous work, knowing that a truly clean reel is a high-performance machine.
First things first, not every component needs a chemical bath. Your reel frame, side plates, and handle can usually just be wiped down with a clean microfiber cloth to get rid of surface dust and salt. It’s the internal gears and metal parts that need the real attention. They're often caked in old, gritty grease that has trapped sand and salt over time, creating a nasty grinding paste that slowly eats your reel from the inside.
Targeting Stubborn Buildup
To break down that old gunk, grab a reel-specific degreaser and apply it to the main gear, pinion gear, and other metal components. Let it sit for a minute or so to really work its way in and dissolve the old lubricant.
Now, take a small, soft brush—an old toothbrush works perfectly for this—and start scrubbing. I can't stress this enough: pay close attention to the teeth of the gears. That's where the performance-killing grit loves to hide. Use that same brush to gently work on any stubborn salt crystals on the spool or reel body.
Choosing the Right Cleaning Agents
Using the wrong chemical on the wrong part is a fast way to cause permanent damage. Some solvents that are perfectly fine for metal gears can destroy plastic parts or rubber seals. You have to know what you're working with.
Here’s a quick rundown to keep you out of trouble.
Cleaning Agents Do's and Don'ts
| Reel Component | Safe to Use | Avoid Using |
|---|---|---|
| Metal Gears/Frame | Reel-specific degreasers, isopropyl alcohol, mineral spirits | Gasoline, harsh solvents, brake cleaner (can be too aggressive) |
| Plastic/Composite Parts | Mild soap and water, simple green (diluted) | Acetone, strong solvents, degreasers that aren't plastic-safe |
| Bearings (Sealed/Shielded) | A single drop of bearing cleaner, light penetrating oil | Soaking in any solvent, heavy degreasers, WD-40 (it's not a cleaner) |
| Drag Washers (Carbon) | Wipe with a dry cloth | Any cleaner or solvent (strips factory grease and can ruin them) |
Getting this right is crucial. A simple mistake here can cost you a whole lot more than a new bottle of cleaner.
One of the biggest mistakes I see people make is dunking their sealed bearings in a harsh solvent. This is a death sentence for a bearing. It strips the special factory lubricant packed inside the sealed unit, and once it's gone, you can't get it back.
For sportfishing legends like the Murray Brothers, a buttery-smooth drag and retrieve weren't a luxury—they were a necessity. They knew that improperly cleaned bearings were a fast track to gear failure during a long fight with a powerful fish.
Instead of soaking them, just wipe the exterior of the bearings with a clean cloth. If one feels a bit gritty when you give it a spin, a single drop of a specialized bearing cleaner or a light solvent is all you need. A quick blast of compressed air afterward will flush out any remaining debris. This little pro tip keeps them spinning freely and preserves your reel's smooth performance for when it really matters.
Proper Lubrication and Flawless Reassembly
Getting the grit out is only half the battle. Now comes the part that makes a reel feel like it just came out of the box—proper lubrication. This is a lesson learned from watching legends like Ed and Frank Murray prep their gear. In the high-stakes world of saltwater tournaments, they knew the right lube in the right spot was the difference between a smooth fight and a catastrophic failure.
With all your parts sparkling clean, it's time to apply that same pro-level attention to detail.
Choosing the Right Lubricant
The biggest mistake I see beginners make is grabbing one type of lube and slathering it on everything. That’s a surefire way to make your reel feel sluggish and gummed up. You have to be specific, just like choosing a hook for a particular bait.
Here’s the simple rule I live by: grease for gears, oil for things that spin fast.
- Reel Grease: Take a small dab of high-quality marine grease and apply a thin, even layer to the teeth of the main and pinion gears. This stuff is thicker and stays put, providing a cushion that prevents metal-on-metal wear when you’re cranking down on a big fish.
- Reel Oil: For parts that move quickly, you need a light, high-performance oil. A single, tiny drop is all it takes for the bearings, handle knobs, and the line roller. Seriously, just one drop.
Over-lubricating is the most common pitfall. A giant glob of grease or a flood of oil doesn't help—it actually hurts. It makes the reel feel slow and heavy, and worse, it becomes a magnet for sand and dirt, creating a grinding paste that completely undoes all your hard cleaning work.
Putting It All Back Together
Once everything is properly lubricated, reassembly should be a breeze. Don't rush it. Just reverse the order you took everything apart, using those pictures on your phone as a roadmap. If you have to force something, stop—it's not lined up correctly. Each piece should slide or click back into place with satisfying ease.
Take your time and double-check that every screw is snug and every clip is seated properly. When you're done, give the handle a few turns. You should immediately feel that silky, buttery-smooth retrieve you've been working to get back. That feeling is the real reward for learning how to clean fishing reels the right way.
Common Reel Care Questions Answered
Even with a solid guide in front of you, a few questions always seem to come up. Let's tackle some of the most common ones I hear from fellow anglers. Getting these details right will give you the confidence to make reel care a regular routine.
It's a habit the legendary Murray brothers lived by before every saltwater tournament—their success was built on leaving absolutely nothing to chance.
How Often Should I Deep Clean My Reels?
This really depends on where and how often you fish.
If you're an avid saltwater angler, plan on a full teardown and deep clean at least once a season. But if your reel takes an accidental swim or you're out on the water several times a week, you'll want to do it more frequently.
For most freshwater fishing, a single deep clean per year is usually plenty to keep everything in top shape. The one rule that's non-negotiable? A light freshwater rinse and a thorough wipe-down after every single trip, no exceptions.
Can I Use WD-40 on My Reel?
Please, don't do it. This is probably the most persistent myth out there, and it can wreck a perfectly good reel.
WD-40 is a solvent and a water displacer, not a true lubricant. It will strip away the essential greases and oils your reel desperately needs to function. Worse yet, the residue it leaves behind actually attracts dirt and grime over time, creating a gritty mess inside your gear. Always stick to products made specifically for fishing reels.
The biggest mistake I see beginners make is using the wrong product, like WD-40, or just plain over-lubricating. A giant glob of grease doesn't help; it just makes the reel feel sluggish and creates a gritty paste when dirt inevitably gets in. Remember the pro mantra: less is more.
Do Different Reel Brands Need Special Cleaning?
The core principles of cleaning a reel are pretty much universal, but the takedown process can definitely have its quirks between brands like Shimano, Penn, or Daiwa.
This is exactly why having the official schematic for your specific model is so critical. It’s your roadmap. For those just starting out, getting a handle on the basics of different equipment is also a huge help; you can learn more by checking out our guide on the best fishing gear for beginners. It ensures you know exactly how your reel is put together before you even pick up a screwdriver.
For the best in high-performance apparel that honors a rich angling legacy, explore the collections at Murray Brothers Palm Beach. Find your new favorite gear at https://www.murraybrosretro.com.
Leave a comment